Using our Advanced Interface, you’ll be able to upload a file into a storage area and from there you’ll be able to send as many safedrops as you want using that file and it will not be deleted from the service until you manually delete it.
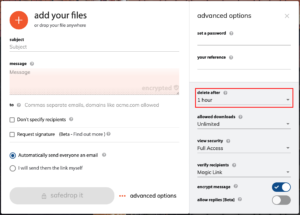
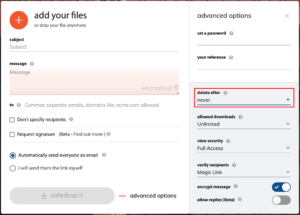
To begin with, login to your safedrop service and send a safedrop with no recipient and with the ‘delete after’ option set to ‘Never’. (you’ll need to scroll down to the bottom of the list to see it)
(You do not need to add any files to this safedrop but you will need to put at least 1 character into the message box to be able to send it.)
Once you have sent the empty safedrop successfully, click ‘track safedrops’ along the top of the page.
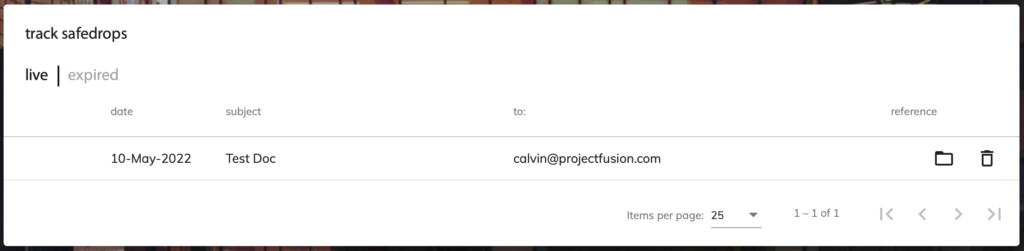
You’ll be taken to the tracking page where you can see a list of all safedrops you have sent and their audit trails. The safedrop you just sent should be at the very top of the list, so once you can see it, click the folder icon to the right hand side of the safedrop to be taken into the ADVANCED INTERFACE.
![]()
Once you have clicked the folder icon, you’ll be taken to the folder that your safedrop is linked to within the advanced interface. If you did not add any files to the safedrop you sent at the beginning of these instructions, you will not see any files here.
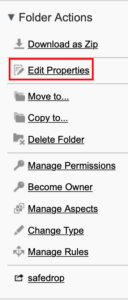
From here, you’ll need to click on the ‘expand folder link’ as shown outlined in red below.


You’ll now see the folder options menu on the right hand side of the page. Click ‘Edit Properties’ from the menu as shown outlined in red below.
You will then be able to rename the folder to call it ’01 My files’ or any other easily distinguishable folder name. I would suggest placing an ’01’ at the beginning of your folder name so that it is easily findable in the advanced interface. Make sure you click Save to save all of your changes.

Now that you have renamed your folder, click on the new folder name link (as shown outlined in red below) to be brought back to the folder.
